I have to admit, after 4 years of knitting, one of my favourite stitches is still the stockinette stitch.
HOWEVER, the things I like least about using this stitch are the curled edges and the fact that it’s not reversible (the back side does not look like the front).
So, when I want to use this stitch, it’s either with a garter stitch border (like for a blanket) or on a piece I know I will be sewing up so the curl doesn’t matter (like for a cushion cover).
I also won’t use this stitch on pieces where both sides are exposed; for instance on an infinity scarf or wrap, because I don’t like the look of the back of this stitch.
BUT, the other day while on Pinterest, I found a link to an article about options when using the stockinette stitch so you don’t get the rolled edges.
They talked about using a garter stitch border, about “blocking” your piece, about using a knit 1, purl 1 ribbing for a similar look that is reversible, and about “the double stockinette stitch”.
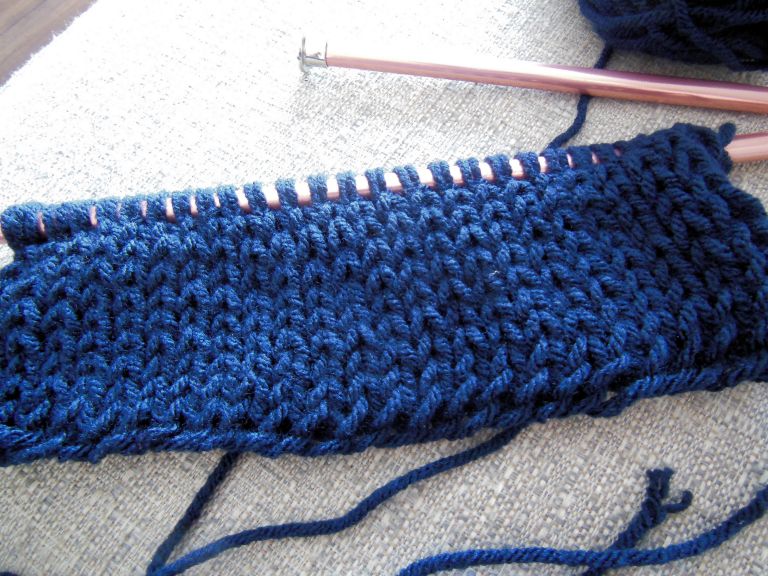
The double stockinette stitch?? I have never, in all the time I’ve been knitting (which isn’t very long but still!) heard about the double stockinette stitch so I had to try it!
It’s SO easy AND…the edges DON’T CURL!!! 😀
PATTERN:
*Knit 1, yarn forward, slip 1 purl-wise, yarn back*.
Repeat from * to * across the row.
Simply cast on an EVEN amount of stitches then:
Knit one stitch.
Bring your yarn forward.
Slip your next stitch purl-wise onto your right needle.
Bring your yarn back.
and REPEAT across the row starting from Knit 1.
Turn your work and repeat.
The pattern is used for both sides of your work.
The double stockinette gives you the V-shaped stitches on both sides of your project so you can use it on pieces like scarves and wraps where you see both sides.


NOTE: I found this to be a very tight stitch, so in order to get the proper width to my piece, I had to take the recommended stitch gauge from my yarn and multiply it by 1.5 in order to obtain the width I wanted. For example, I’m using a chunky yarn that has a gauge of 14 stitches for 4″, however, I had to use 21 stitches in order to obtain the 4″. Also, I sized up my needles from the recommended size to create a looser stitch.
Below is a video of me showing you the stitch so you can get a better idea of what I mean.
So if you give it a try, I would love to see pictures! You can share them on my Facebook page.
Or, if you have any questions, please feel free to contact me at diana.poirier@yahoo.ca.
Happy knitting!
Diana


